Programs
Free Design and High-Spec Course
Fee
5,000 Yen
You can take the finished work back home on the same day. The works made are for decoration purposes only.
High-grade course
Fee
8,000 Yen (shipping fee paid extra)
Experience booking closed.
Simple course: Bring your own object to gold plate
Fee
2,000円
A minimum of 6-7 cm of flat surface to which the protective sticker can be attached is required. If it is small, the location of the gold leaf and the protective seal will be smaller. Finish applying the protective seal (required) to the gold leaf area of the work you brought in.
Experience booking closed.
Please note
- ※ Time is our main criteria. Since we have a lot of individual duties, the time spent of each production may vary. Please make sure that you have ample spare time when making your reservation.
- ※ Payment of the experience by cash please.
- There are a lot of participation in the event on year-end and New Year holidays and Sundays and holidays. Because I can not experience at the workshop, thank you.
About the Experience Course
Free Design and High-Spec Course
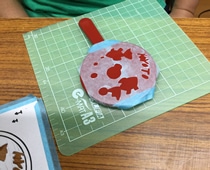
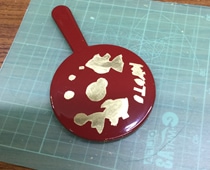
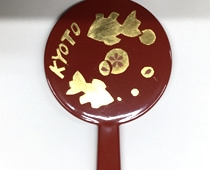
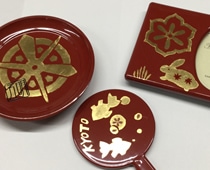
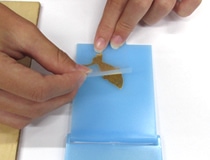
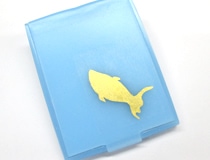
Sample Works from the Free Design Course


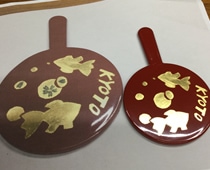
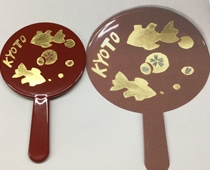
Sample Works from the High Spec Course

Free Design Course:
You will first apply four mini gold leaf sheets. After that, you are free to create your own original design.
High-Spec Course:
You can choose from our design sheets or request your own custom design.Please contact us by email at kyoto@gomei.ne.jp for details.
High-grade course
In this course you can choose from a rounded plate, a picture stand or a mirror.
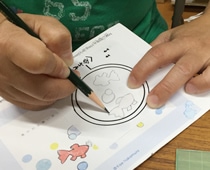
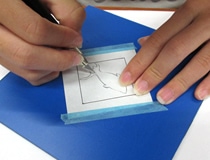
First, draw your own design on a designated pattern paper. You can also bring a design artwork that you can copy on the patter paper.
When the design is done, neatly fix the pattern paper with your design with masking tape onto a stretched mount.

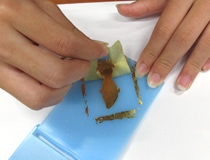
Neatly cut out your design from the pattern paper with a cutter. Then slightly remove the masking tape with a pair of tweezers. If you are unable to, cut it off in order to repair it.
Then peel off the pattern paper with the masking tape.
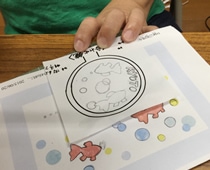
Then you will remove the peeled off masking tape from the mount. Carefully stick it to the places where you want to cover with gold foil.
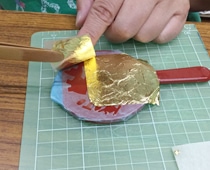
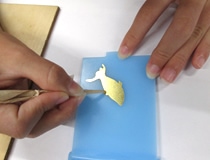
The part you want to gild with gold should be in the centre. When it is in the centre, cover it with glue. Then, practice how to grab the gold foil with a pair of sticks. When you are able to grab the foil, challenge yourself and place on the spot.
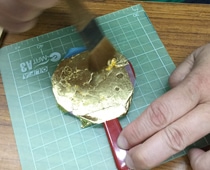
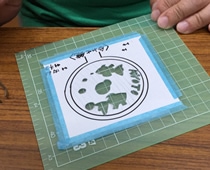
When you evenly stick the gold foil, the staff will clean the surface of the foil with cotton and a dusting brush, polishing the gold foil.
Slowly peel off the masking tape, being careful not to tamper the gold foil. At this point the work is done.

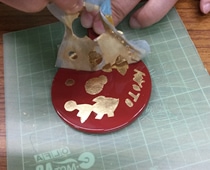
At the end of the process, you can write letters or draw shapes with an original correction stick as well as fix the places where the gold foil is loose.
When the excess gold foil is taken away, you will have experienced gold gilding!
Simple course: Bring your own product to gold plate
This course allows you use gold foil to gild your own product that you bring with you. There are many things you can bring, such as smartphone cases or mirrors. Please note: You cannot bring products without a protective seal that have uneven or rough surface.
First draw a design you would like to place onto your product on a square pattern paper 4cm x 4cm. Then cut out the pattern aiming to the masking tape on the bottom, peeling off the masking tape neatly afterwards.
The staff will then cover the surface with glue, and plate the gold foil onto it. Afterwards, the staff will dust it and neatly peel off the tape.
If there are parts of the gold foil you want to fix, you will be able to take your time and fix it with our original correction stick.
Finally, you will stick a slightly larger protective seal over the gold-gilded part and it is done!
Final Product
Minishop
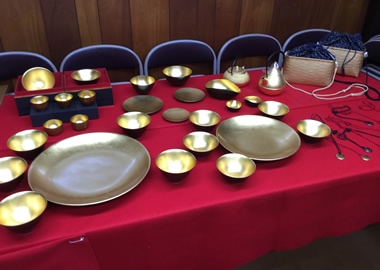
Recently, we have established a mini shop in our studio where we sell numerous products on which we used enzuke gold leaves (one of the techniques of making gold foil) on items such as tableware, kettles and pendants.
Below is a map of the shop surroundings (Approximately a 10-minute walk from Kyoto Station). Leave the Kyoto Station through the main ticket gates and walk along the main Post Office which is on the left. Once you pass the buildings of Kansai Denryoku, the Fire Department and the traffic lights and go straight on to the North and you find yourself in a quite Monzen-cho where you can see our signboard. Please print out the map and refer to it to help you on the way to our shop.